Download Bigfoot SDK
How to install
The first thing you need to do to get started using the Bigfoot SDK, is to add it’s unity package to your project. To do this, go to Window -> Package Manager. Once inside, click on the + sign on the top left corner, and select Add package from git URL.
When prompted for the url, use the one below. Once the project compiles, you will have all of the necessary files in your project.
https://bitbucket.org/bigfootgaming/bigfoot-sdk-dll.git#upm-0.7
How to update
Within the same version
If there is an update in the package, and it’s within the same version (for example 0.6.27-> 0.6.28), you need to go to the Packages folder in your local file system. The easiest way is to find the folder in the hierarchy, and right click on it, and Reveal on Finder in OSX, or Shown in Explorer in Windows.
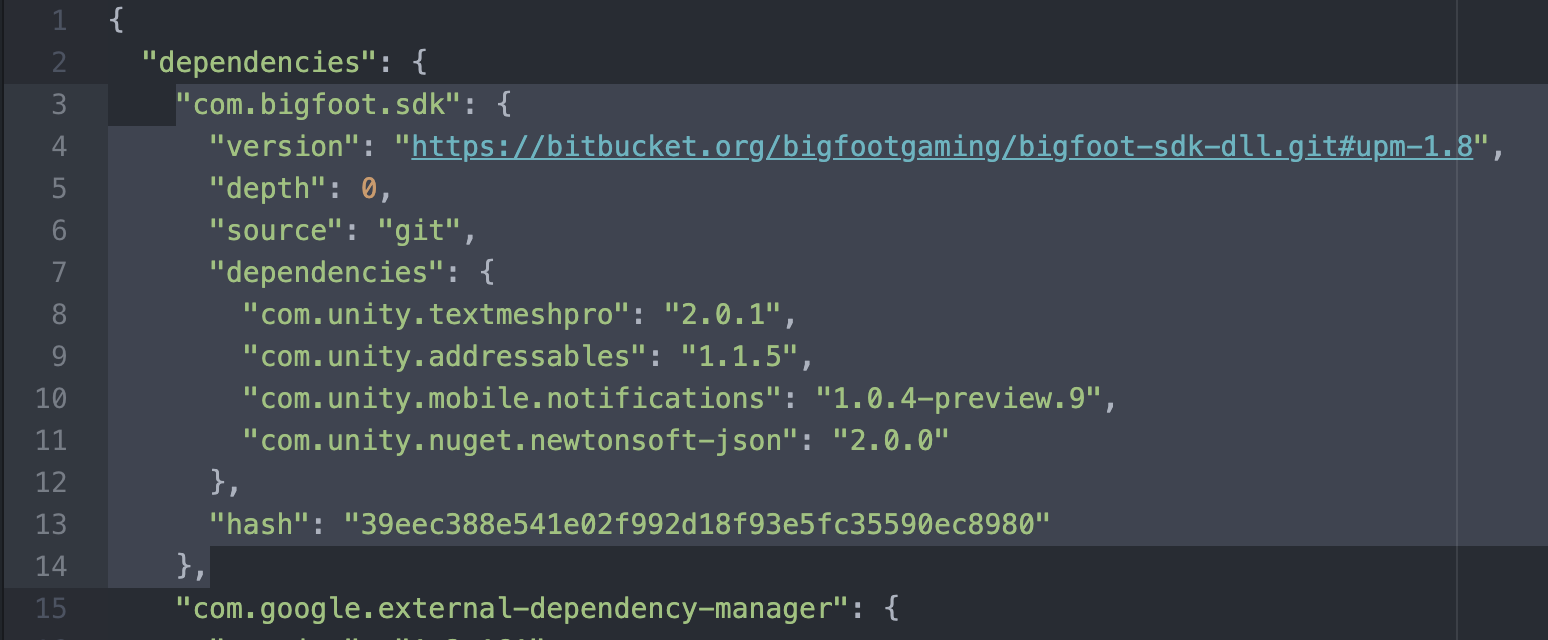
Once you are in the folder, open the file packages-lock.json with any text editor, and delete the whole block of the Bigfoot Sdk (the selected part in the image below)
Once you delete that part, save the file, and go back to Unity. As soon as you give Unity focus again, the new version of the SDK will be downloaded. If you want to make sure it was updated, you can go to Window -> Package Manager, and make sure that the version number besides Bigfoot SDK is the one you need.

New version
If there is an update in the package, and it’s to a new version (for example 0.6.x-> 0.7.x), you need to follow all of the above steps as if it were within the same version, and before saving the manifest.json file, locate in the dependencies blob, where the url for the Bigfoot SDK is, and make sure you update the version in the url.
For the above example, it would mean changing
https://bitbucket.org/bigfootgaming/bigfoot-sdk-dll.git#upm-0.6
to
https://bitbucket.org/bigfootgaming/bigfoot-sdk-dll.git#upm-0.7